Do you want to turn your backyard into a beautiful and functional garden? You may find that a raised garden is the best option. Raised bed gardens have many benefits, such as better soil control, better drainage and less back pain while gardening. In this step-by-step guide, we’ll show you how to create your own raised garden. This will help you on your way.
1. Choose a Location
The first step in creating a raised garden is deciding where to place it. Find a spot in your yard that gets at least 6 to 8 hours of sun per day. Your plants need sunlight to grow healthily. Also, make sure the area is mostly flat and easy to maintain.
2. Grab What you Need
Before you start organizing your loft bed, make sure you have everything you need. do you need:
- Wood: Cedar or pine are both good choices for bed frames because they don’t rot.
- Screws: Use screws that will not rust to hold the wood together securely.
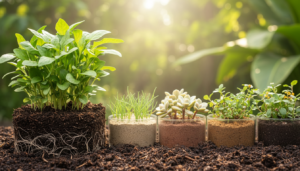
- Soil: Buy good quality plant soil or make your own by mixing compost, vermiculite and peat moss.
- Compost: Compost improves the soil and gives plants the nutrients they need to grow.
- Tools: For this project you will need a saw, a drill and a spirit level.
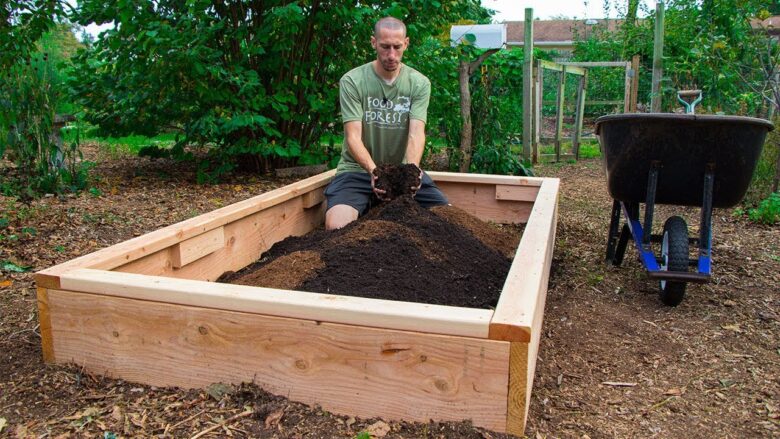
3. Assemble the Loft Bed
To make the sides of the loft bed, cut the wood to the desired length. The most common size is 4 feet wide by 8 feet long by 12 inches high. But dimensions can be changed to suit your space and needs. Mount the wooden blocks in a rectangular frame using screws.
Place the frame where you want it and make sure it is level. If the ground is uneven, you may need to dig and level the spot before placing the bed. This prevents the bed from shifting and keeps it stable.
4. Put the Soil in the Seed Bed
Now comes the fun part: getting the dirt into the raised bed. If your bed is deep, you may need to put a layer of soil or small stones in the bottom to help it drain. Then add a mixture of garden soil and compost to give your plants a fertile, healthy place to grow.
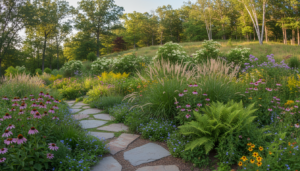
5. Planning the Shape of the Garden
Plan the layout of your garden before you start planting. Think about what plants you want to grow, how far apart they should be, and how much light they need. This will help you place your plants where they are best suited for growth and easiest to care for.
6. Start your Garden
Now that you know the layout, it’s time to start planting! Move seedlings gently or sow according to spacing instructions. Once established, give them plenty of water and make sure they are well watered and cared for as they grow.
7. Add Overlays and Leave Untouched
Spread an organic mulch around the plants to keep them moist and prevent weeds from growing. As the mulch breaks down, it also adds nutrients to the soil. Keep an eye on your garden and water as needed. Fertilize it regularly with organic fertilizers.
8. Have Fun in the Garden
Now that you’ve created and watched your raised garden grow, it’s time to enjoy the fruits of your hard work. Harvest your plants often and enjoy growing them yourself.
Conclusion
All in all, building your own raised garden is a great way to start a rewarding planting journey. With careful planning and the right tools, you can turn a small piece of land into a beautiful oasis full of fresh food. Raised beds make it easier to control dirt, remove excess water and reach the plants. This makes it an excellent choice for gardeners of all skill levels. Not only can taking care of your plants be fun, but picking home-grown fruits and vegetables can also be satisfying. Have fun growing and make your homemade garden a source of pride and joy in your backyard.
FAQs
1. What are the benefits of raised gardens?
Raised bed gardens have many benefits, including improved soil control, better drainage and less strain on your back while gardening. The increased height also deters pests and allows for better ventilation of plants.
2. Which material is best for building a loft bed?
Cedar or redwood are great choices for bed frames because they are naturally resistant to decay. These woods ensure the longevity of your raised garden. Anti-rust screws should also be used to ensure solid mounting.
3. How do I choose the right spot for my raised garden?
Choose a location that receives at least 6 to 8 hours of sunlight per day. Sunlight is essential for healthy plant growth. Make sure the area is relatively flat and easy to maintain.
4. Can I adjust the height of the loft bed?
Yes, you can adjust the dimensions of your raised garden to suit your space and gardening needs. However, a common size is 4 feet wide by 8 feet long by 12 inches high.
5. What soil should I use for my raised garden?
A good quality garden soil mixed with compost, vermiculite and peat moss is ideal for raised beds. This mix creates a nutrient-rich environment in which your plants can thrive.